# 카프카 클라이언트
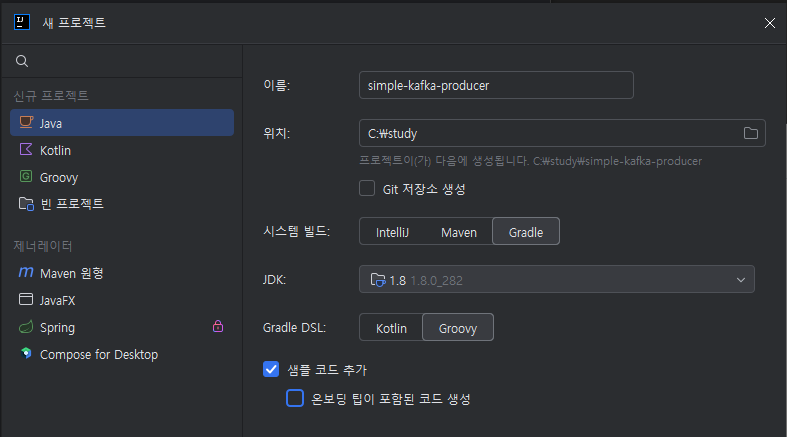
# 프로듀서 프로젝트 생성
- 프로젝트 생성

- 카프카 클라이언트 라이브러리 추가
build.gradle
dependencies {
    implementation 'org.apache.kafka:kafka-clients:2.5.0'
    implementation 'org.slf4j:slf4j-simple:1.7.30'
}
1
2
3
4
2
3
4
- SimpleProducer.java 소스 작성
public class SimpleProducer {
    private final static Logger logger = LoggerFactory.getLogger(SimpleProducer.class);
    private final static String TOPIC_NAME = "test";
    private final static String BOOTSTRAP_SERVICES = "my-kafka:9092";

    public static void main(String[] args){

        Properties configs = new Properties();
        configs.put(ProducerConfig.BOOTSTRAP_SERVERS_CONFIG, BOOTSTRAP_SERVICES);
        configs.put(ProducerConfig.KEY_SERIALIZER_CLASS_CONFIG, StringSerializer.class.getName());
        configs.put(ProducerConfig.VALUE_SERIALIZER_CLASS_CONFIG, StringSerializer.class.getName());

        KafkaProducer<String, String> producer = new KafkaProducer<>(configs);

        String messageValue = "testMessage";
        ProducerRecord<String, String> record = new ProducerRecord<>(TOPIC_NAME,messageValue);
        producer.send(record);
        logger.info("{}",record);
        producer.flush();
        producer.close();

    }
}
1
2
3
4
5
6
7
8
9
10
11
12
13
14
15
16
17
18
19
20
21
22
23
2
3
4
5
6
7
8
9
10
11
12
13
14
15
16
17
18
19
20
21
22
23
- 토픽 생성
bin/kafka-topics.sh --bootstrap-server my-kafka:9092 --create --topic test --partitions 3
1
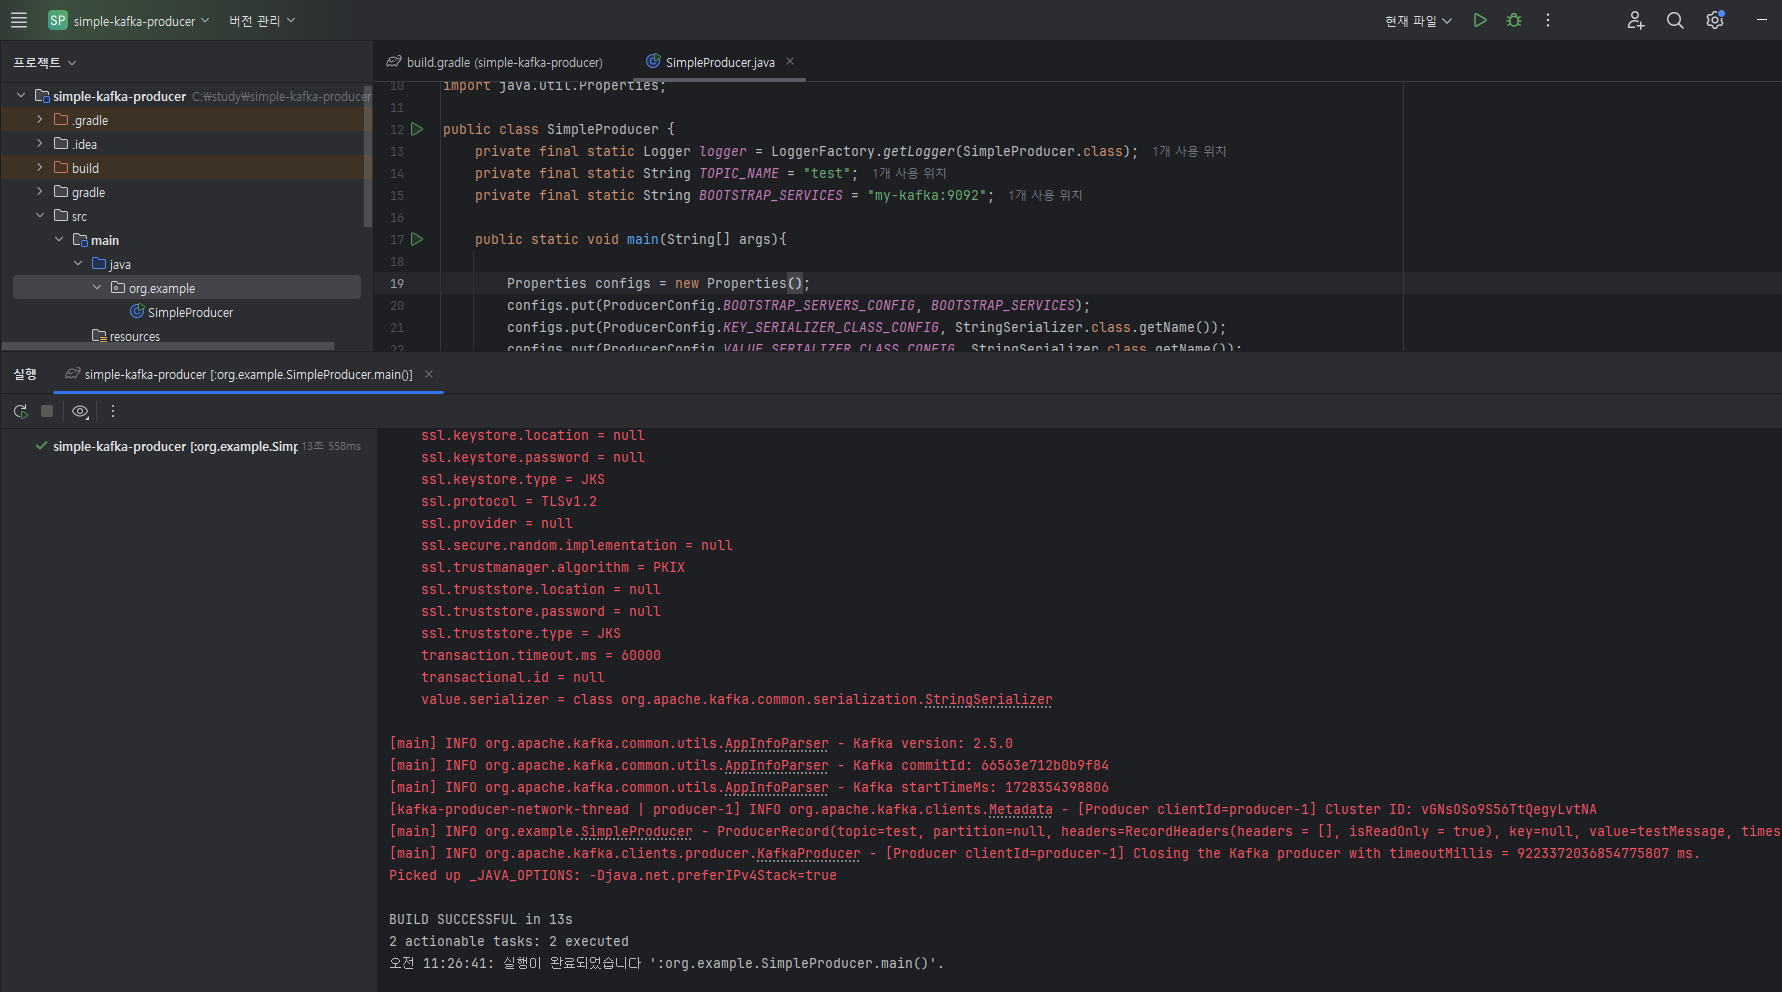
클라이언트 소스 실행
![15]()
토픽에 데이터 전송 확인
bin/kafka-console-consumer.sh --bootstrap-server my-kafka:9092 --topic test --from-beginning
1
# 메시지 키를 가진 데이터를 전송하는 프로듀서
# 메시지 키가 포함된 레코드를 전송하고 싶다면 ProducerRecords 생성시 파라미터로 추가
ProducerRecord<String,String> record = new ProducerRecord<>("test","Pangyo","23");
1
클라이언트 실행
# 메시지 키가 지정된 데이터 확인
bin/kafka-console-consumer.sh --bootstrap-server my-kafka:9092 --topic test --property print.key=true --property key.separator="-" --from-beginning
1
# 파티션을 직접 지정하고 싶다면
토픽이름, 파티션번호, 메시지키, 메시지 값을 순서대로 파라미터로 넣고 생성.
ProducerRecord<String,String> record = new ProducerRecord<>(TOPIC_NAME, partitionNo, messageKey, messageValue);
1
# 커스텀 파티셔너를 가지는 프로듀서
- 기본 파티셔너를 사용할 경우 메시지의 키의 해시값을 파티션에 매칭하여 데이터를 전송하므로 어느 파티션에 들어가는지 알 수 었다.
- Partitioner 인터페이스를 사용하여 사용자 정의 파티셔너를 생성하면 파티션 지정 가능
public class CustomPartitioner implements Partitioner {

    @Override
    public int partition(String topic, Object o, byte[] keyBytes, Object key, byte[] bytes1, Cluster cluster) {
        if(keyBytes == null) {
            throw new InvalidRecordException("Need Message Key");
        }
        if(((String)key).equals("Pangyo")) {
            return 0;
        }
        List<PartitionInfo> partitions = cluster.partitionsForTopic(topic);
        int numPartitions = partitions.size();
        return Utils.toPositive(Utils.murmur2(keyBytes))%numPartitions;
    }

    @Override
    public void close() {

    }

    @Override
    public void configure(Map<String, ?> map) {

    }
}
1
2
3
4
5
6
7
8
9
10
11
12
13
14
15
16
17
18
19
20
21
22
23
24
25
2
3
4
5
6
7
8
9
10
11
12
13
14
15
16
17
18
19
20
21
22
23
24
25
public class SimpleProducer {
    private final static Logger logger = LoggerFactory.getLogger(SimpleProducer.class);
    private final static String TOPIC_NAME = "test";
    private final static String BOOTSTRAP_SERVICES = "my-kafka:9092";

    public static void main(String[] args){

        Properties configs = new Properties();
        configs.put(ProducerConfig.BOOTSTRAP_SERVERS_CONFIG, BOOTSTRAP_SERVICES);
        configs.put(ProducerConfig.KEY_SERIALIZER_CLASS_CONFIG, StringSerializer.class.getName());
        configs.put(ProducerConfig.VALUE_SERIALIZER_CLASS_CONFIG, StringSerializer.class.getName());

        // 커스텀 파티셔너를 지정한 경우 옵션을 사용자 생성 파티셔너로 설정하여 kafkaProducer 인스턴스를 생성해야 한다.
        configs.put(ProducerConfig.PARTITIONER_CLASS_CONFIG, CustomPartitioner.class);

        KafkaProducer<String, String> producer = new KafkaProducer<>(configs);

        ProducerRecord<String,String> record = new ProducerRecord<>("test","Pangyo","23");
        producer.send(record);
        logger.info("{}",record);
        producer.flush();
        producer.close();
    }
}
1
2
3
4
5
6
7
8
9
10
11
12
13
14
15
16
17
18
19
20
21
22
23
24
2
3
4
5
6
7
8
9
10
11
12
13
14
15
16
17
18
19
20
21
22
23
24
# 브로커 정상 여부를 확인하는 프로듀서
# 동기 결과 확인
RecordMetadata metadata = producer.send(record).get(); // 결과를 동기적으로 가져올 수 있다.
logger.info(metadata.toString());
1
2
2
# 비동기 결과 확인 Callback 인터페이스
사용자 정의 callback 클래스를 생성하여 레코드의 전송 결과에 대응하는 로직을 만들 수 있다.
public class ProducerCallback implements Callback {
    private final static Logger logger = LoggerFactory.getLogger(ProducerCallback.class);

    @Override
    public void onCompletion(RecordMetadata recordMetadata, Exception e) { // 레코드의 비동기 결과를 받음.
        if(e != null) {
            logger.error(e.getMessage(), e);
        } else {
            logger.info(recordMetadata.toString());
        }
    }
}
1
2
3
4
5
6
7
8
9
10
11
12
2
3
4
5
6
7
8
9
10
11
12
public static void main(String[] args) throws ExecutionException, InterruptedException {

    Properties configs = new Properties();
    configs.put(ProducerConfig.BOOTSTRAP_SERVERS_CONFIG, BOOTSTRAP_SERVICES);
    configs.put(ProducerConfig.KEY_SERIALIZER_CLASS_CONFIG, StringSerializer.class.getName());
    configs.put(ProducerConfig.VALUE_SERIALIZER_CLASS_CONFIG, StringSerializer.class.getName());
    configs.put(ProducerConfig.PARTITIONER_CLASS_CONFIG, CustomPartitioner.class);

    KafkaProducer<String, String> producer = new KafkaProducer<>(configs);

    String messageValue = "testMessage";
    ProducerRecord<String,String> record = new ProducerRecord<>("test","Pangyo","26");
    producer.send(record, new ProducerCallback());
    logger.info("{}",record);
    producer.flush();
    producer.close();
}
1
2
3
4
5
6
7
8
9
10
11
12
13
14
15
16
17
2
3
4
5
6
7
8
9
10
11
12
13
14
15
16
17
← 카프카 커맨드라인 툴 컨슈머 API →

